A pantry is more than a storage space for food—it’s the heart of your kitchen’s organization. A well-designed pantry saves you time during meal prep, helps reduce waste, and can even save you money by preventing duplicate purchases. Whether you have a spacious walk-in pantry, a small closet, or a single cabinet dedicated to food storage, there are creative strategies to maximize every inch. In this guide, we’ll explore practical, stylish, and highly functional ways to keep your pantry in top shape year-round.
Step One: Start Fresh With a Complete Declutter
The first step toward any organized space is removing the chaos. Completely empty your pantry—yes, every shelf, bin, and drawer. This not only allows you to deep clean the space but also forces you to evaluate each item you’ve been storing.
How to Sort Items Effectively
Create four categories:
- Keep – Items you use regularly and that are still fresh.
- Donate – Unopened, non-perishable goods you don’t plan to use but are still within the expiration date.
- Discard – Expired, stale, or damaged goods.
- Relocate – Items that don’t belong in the pantry but ended up there by mistake (such as tools, non-food items, or seasonal décor).
Once the pantry is empty, wipe down all shelves with warm soapy water, let them dry completely, and, if necessary, replace shelf liners to give the space a fresh start.
Step Two: Categorize for Efficiency
The way you group your pantry items can dramatically affect how efficiently you use them. Instead of storing items wherever they fit, create dedicated zones for specific categories:
- Baking Supplies – Flour, sugar, baking powder, cocoa, yeast.
- Breakfast Foods – Cereals, oats, granola, pancake mix.
- Canned Goods – Vegetables, soups, sauces, beans.
- Grains and Pasta – Rice, quinoa, spaghetti, noodles.
- Snacks – Chips, crackers, cookies, trail mix.
- Condiments and Oils – Vinegar, olive oil, sauces, salad dressings.
Within each category, store similar-sized items together to keep the space visually tidy and easy to navigate.
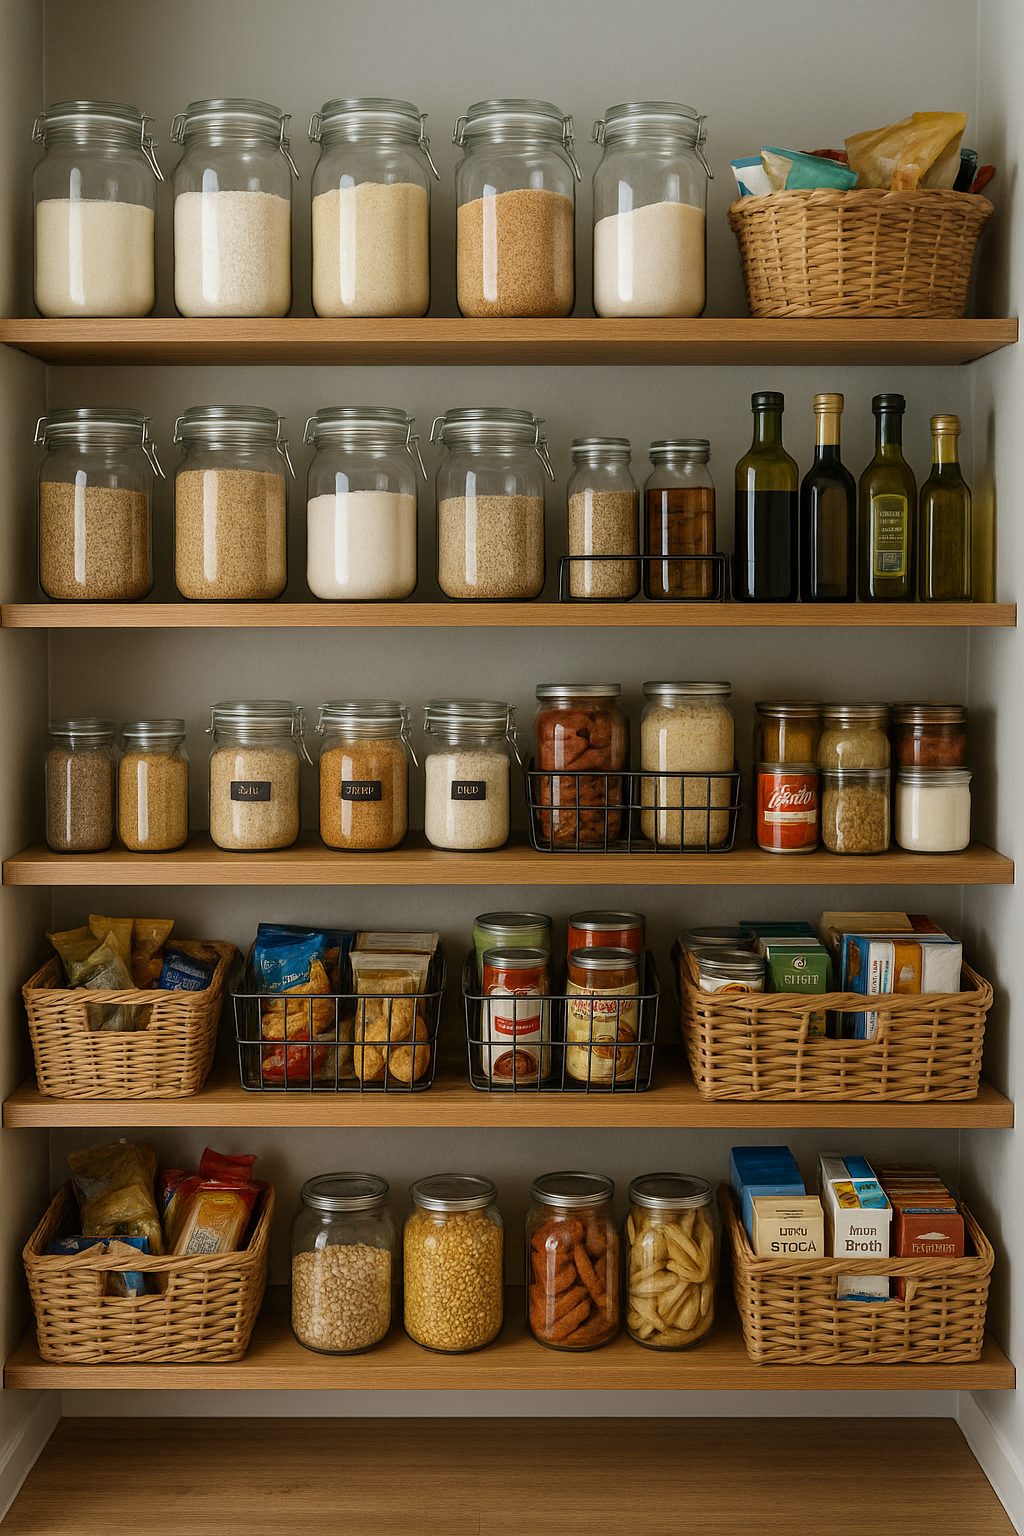
Step Three: Upgrade to Clear, Airtight Containers
Switching to clear containers for dry goods not only keeps them fresher for longer but also helps you quickly identify when you’re running low.
- Glass Jars – Ideal for beans, lentils, rice, and pasta. They’re durable, airtight, and visually appealing.
- Plastic BPA-Free Containers – Lightweight and shatterproof, perfect for cereals, snacks, and baking mixes.
- Small Canisters – Great for spices, cocoa powder, and specialty flours.
Always label each container with the product name and expiration date, either using a printed label or a chalkboard sticker for easy updates.
Step Four: Maximize Shelf Space With Smart Solutions
Adjustable Shelves
Standard fixed shelves can waste precious vertical space. Adjustable shelving allows you to customize heights to fit taller bottles or shorter jars perfectly.
Pull-Out Drawers and Baskets
For deep pantry shelves, pull-out baskets and drawers prevent items from getting lost in the back. You’ll be able to see and reach everything without emptying an entire shelf.
Under-Shelf Baskets
These clip-on baskets are excellent for storing lightweight items such as snack bars or tea packets, making use of the often-overlooked space beneath shelves.
Step Five: Use Vertical and Door Space
If your pantry has a door, transform it into storage space. Over-the-door racks can hold spices, foil, parchment paper, condiments, or even small snacks.
Vertical space inside the pantry can also be maximized with stackable bins, tiered shelves for canned goods, or hooks for hanging lightweight tools like measuring cups.
Step Six: Incorporate Lazy Susans and Tiered Organizers
Lazy Susans are perfect for storing oils, vinegars, and sauces, ensuring nothing gets hidden in the back. Tiered organizers are particularly useful for canned goods and spice jars, letting you view every label at a glance.
Step Seven: Create Special Zones for Household Needs
Daily-Use Zone
Reserve a section at eye level for the items you use daily—coffee, tea, breakfast cereals, or lunchbox snacks.
Bulk Storage Zone
If you buy large quantities of staples, designate a separate shelf or storage bin for them. Use smaller containers in the main pantry for day-to-day use and refill from your bulk supply.
Kids’ Snack Zone
For families with children, place a small bin or basket on a lower shelf with snacks they can access without climbing or rummaging through other shelves.
Step Eight: Add Lighting for Function and Style
A dark pantry makes it harder to maintain organization. Add LED strip lights along shelves or motion-sensor lights near the entrance to brighten every corner. Not only does it make finding items easier, but it also adds a polished, high-end look.
Step Nine: Maintain With a Weekly Pantry Check
The key to keeping your pantry organized is consistent upkeep. Once a week, take five minutes to:
- Check for items nearing their expiration date.
- Rotate stock so older items are used first (“first in, first out” method).
- Return misplaced items to their correct zones.
- Wipe up any crumbs or spills immediately to prevent pests.
Step Ten: Add Personal Touches
While functionality is the goal, there’s no reason your pantry can’t also be visually appealing. Consider matching your storage containers, adding a small piece of art, or using baskets that coordinate with your kitchen’s color scheme.
Final Thoughts
An organized pantry is a time-saver, a money-saver, and a sanity-saver. By decluttering, categorizing, using smart storage solutions, and maintaining your system regularly, you can ensure that every inch of your pantry is working for you. With these creative organization ideas, your pantry will not only function efficiently but also become a space you enjoy opening every day.